Creating a purchase order
Available on: Pro Plus.
A purchase order records what you have ordered from a supplier, and in most setups updates your Shopify inventory as that stock is ordered and received. This page covers building one by hand.
Whether it writes to Shopify depends on how your store is set up, and on this order's own Sync inventory to Shopify setting where your store has one. See how purchase orders update Shopify inventory.
Before you start
Products come from Shopify. Create the product in Shopify first and it syncs into Stockie automatically, usually within a minute - there is nothing to import.
You will also want at least one supplier set up, so costs and supplier SKUs fill in for you.
Create the purchase order
- Go to
Purchase ordersand click Create purchase order. - Choose your supplier under Select supplier.
- Choose where the stock is going under Select destination.
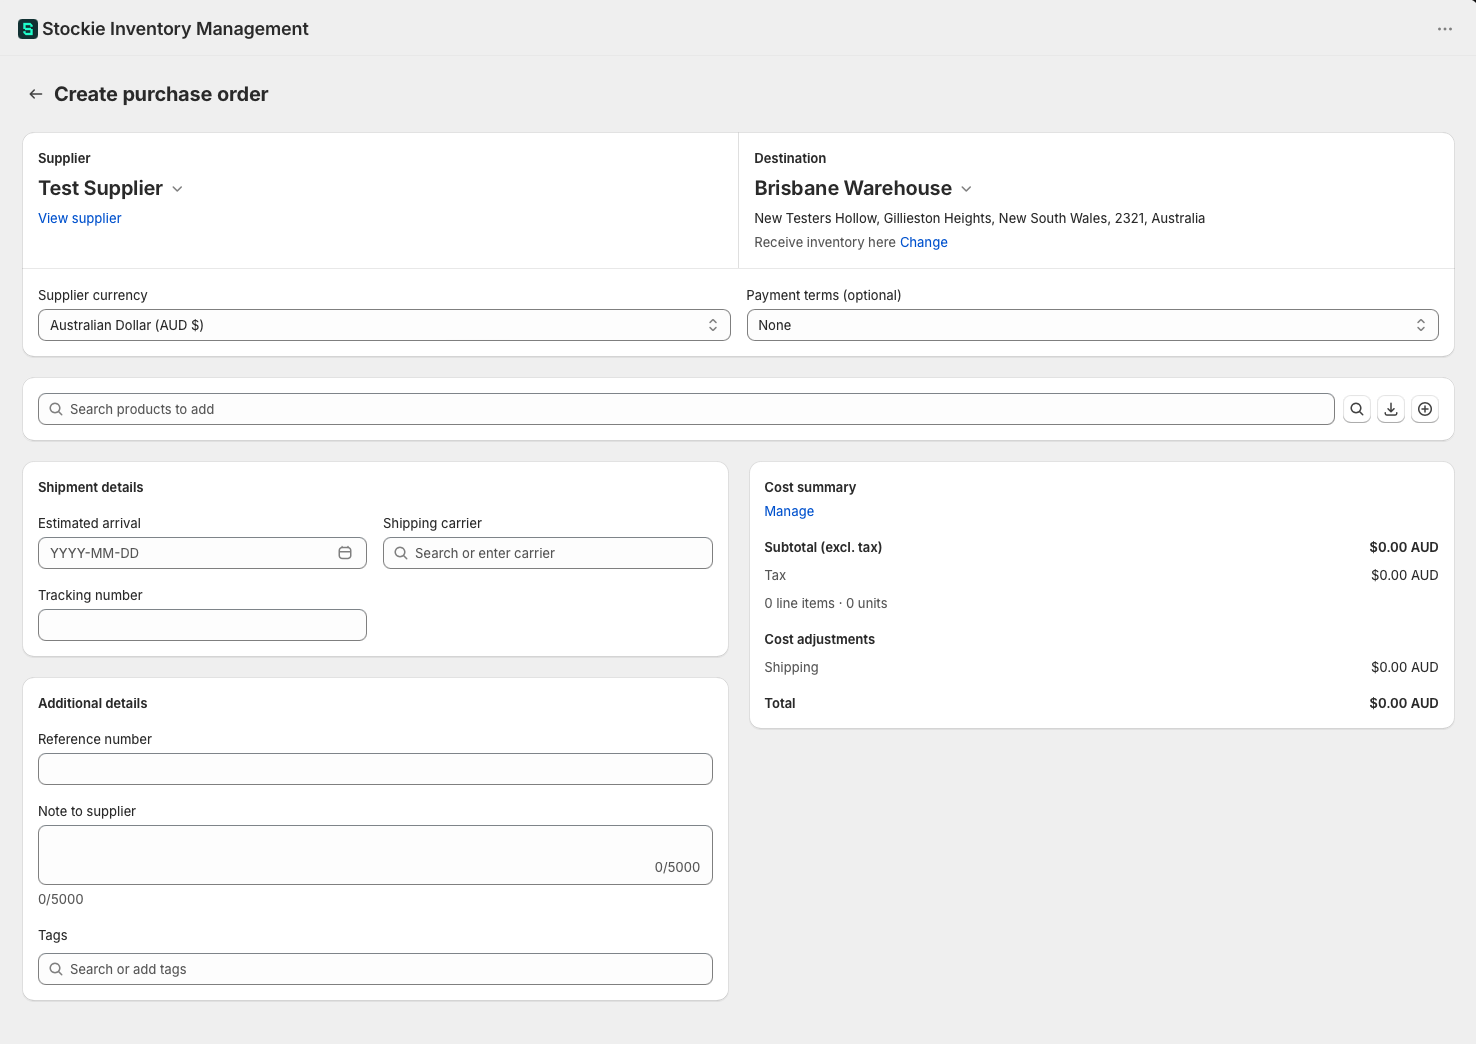
Why the destination matters straight away
The destination does two things: it sets the delivery address printed on the purchase order, and it decides which location's stock figures appear against each product.
Set the destination before you add products. The Inventory column stays empty until there is one, which is the usual reason it looks broken.
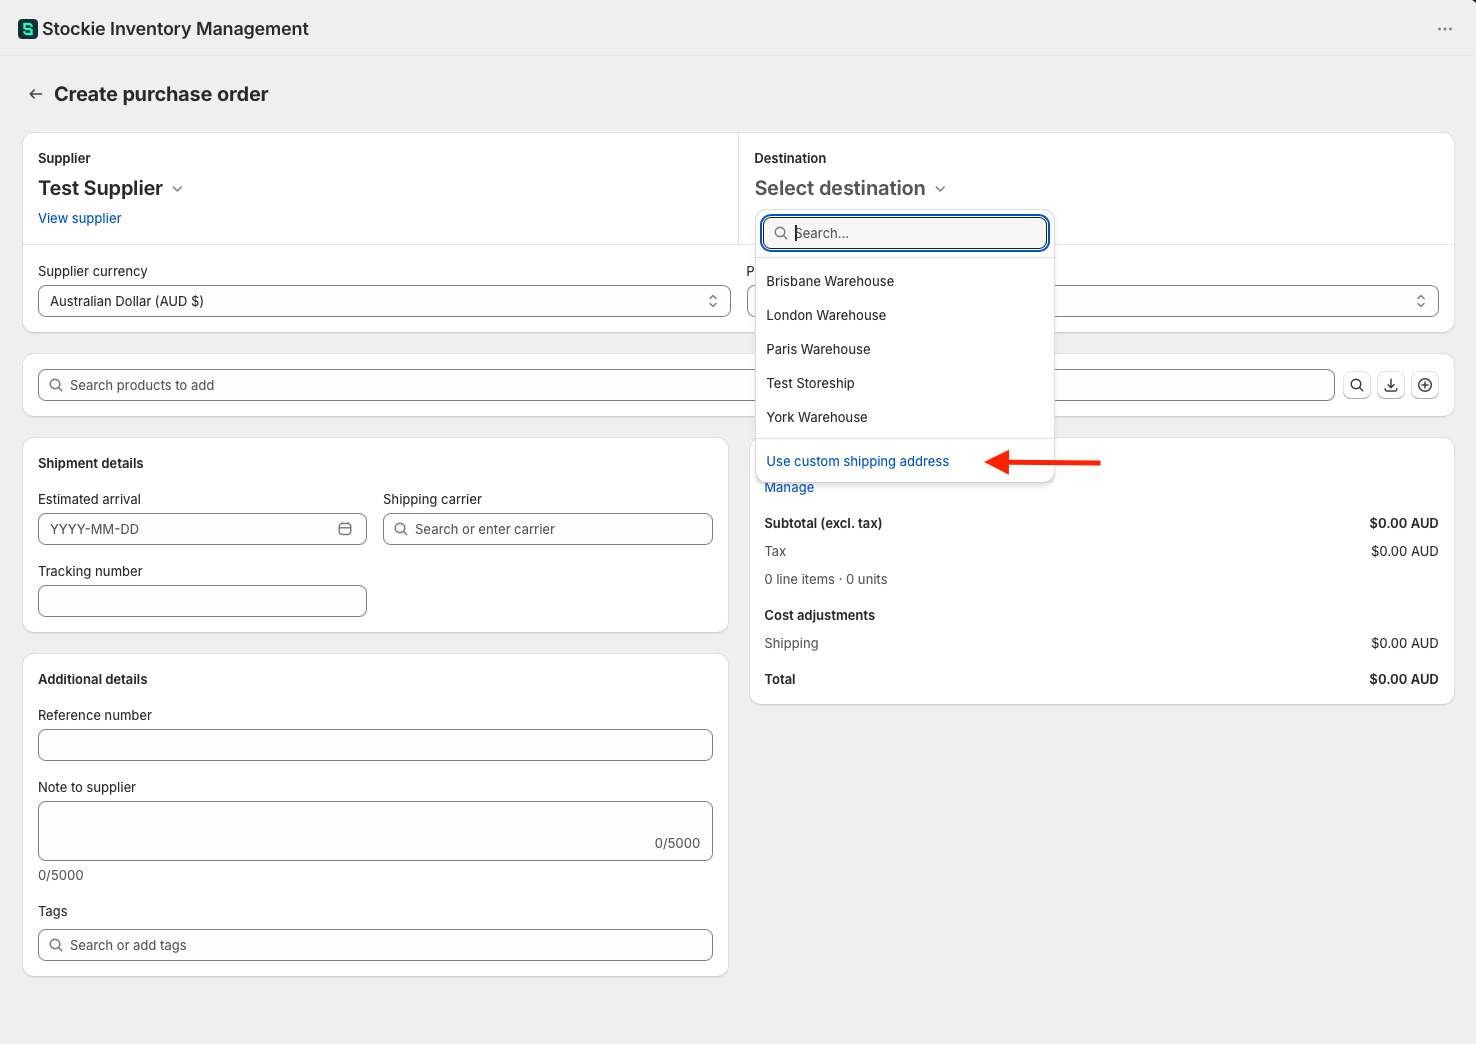
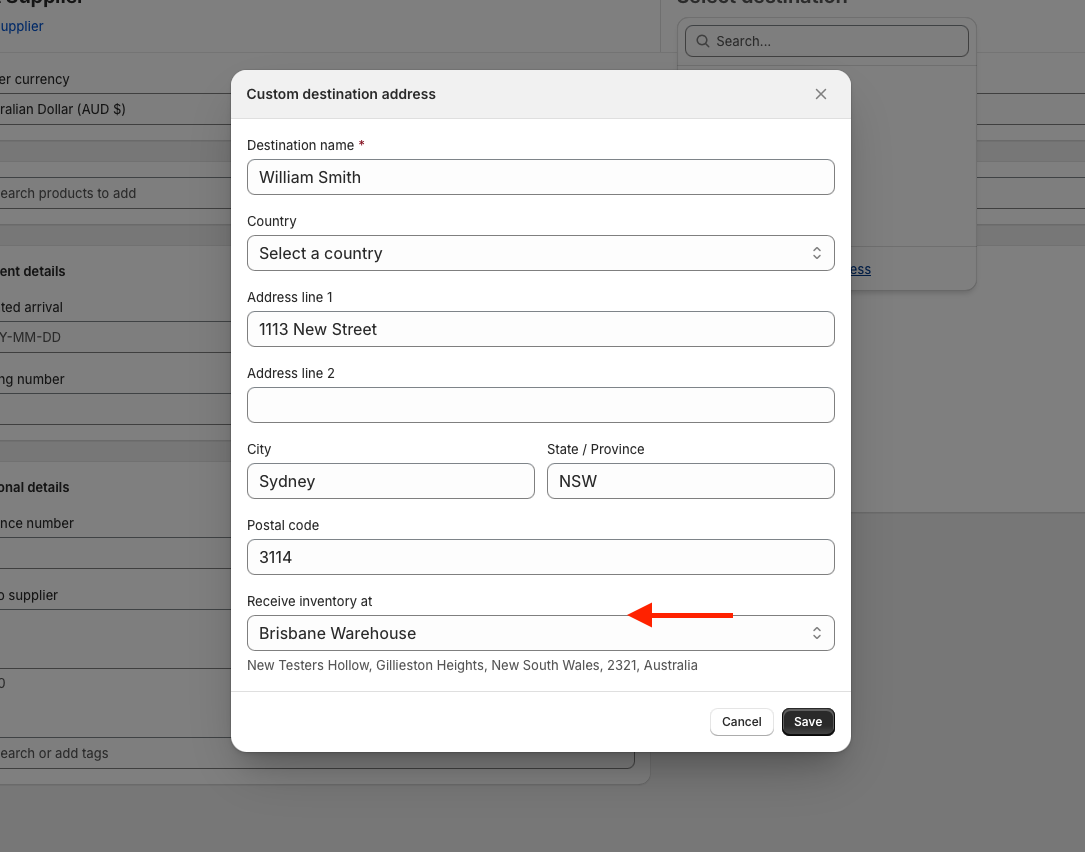
If your supplier ships somewhere other than one of your Shopify locations - direct to a customer, for example - choose Custom destination address and enter the address. You then set Receive inventory at to the Shopify location that should receive the stock. The address on the purchase order and the location your inventory lands in are separate on purpose.
Add your products
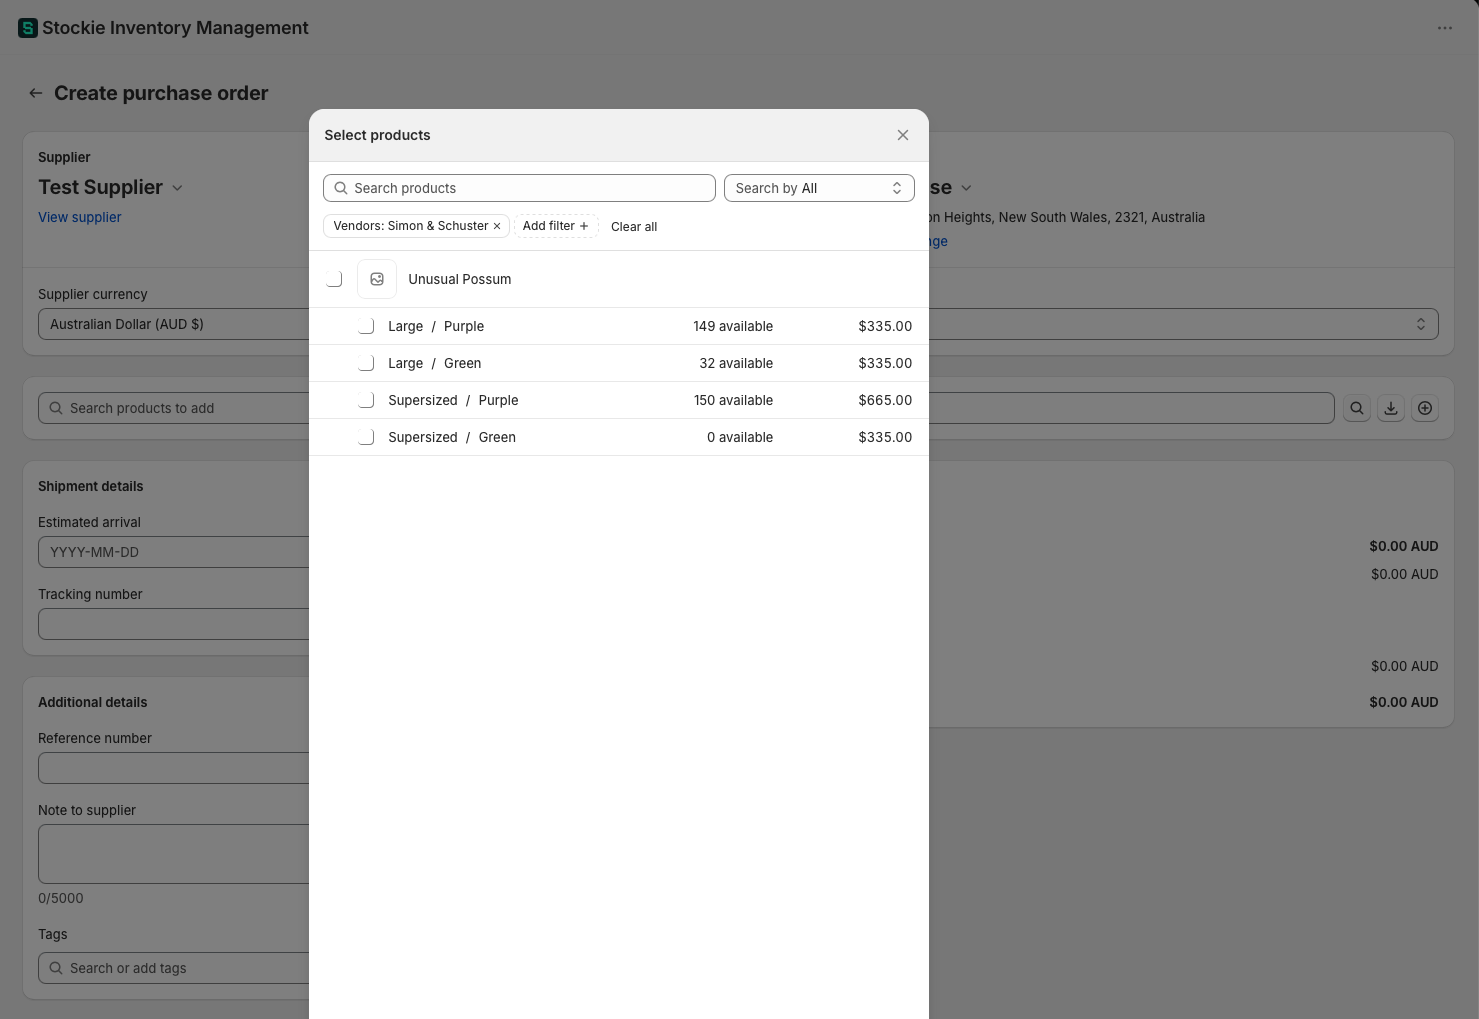
There are three ways to add lines, using the search field and the buttons beside it:
- Search products to add - type to find products by title, SKU or barcode
- Browse products - open the full picker and select several at once
- Import CSV - add many lines from a file. Each row matches a product that already exists in Shopify
If your supplier is mapped to a Shopify vendor or a product tag, the picker only shows that supplier's products. If products were assigned to the supplier manually, the picker shows your whole catalogue - manual assignments do not filter it.
Ordering something that isn't in Shopify
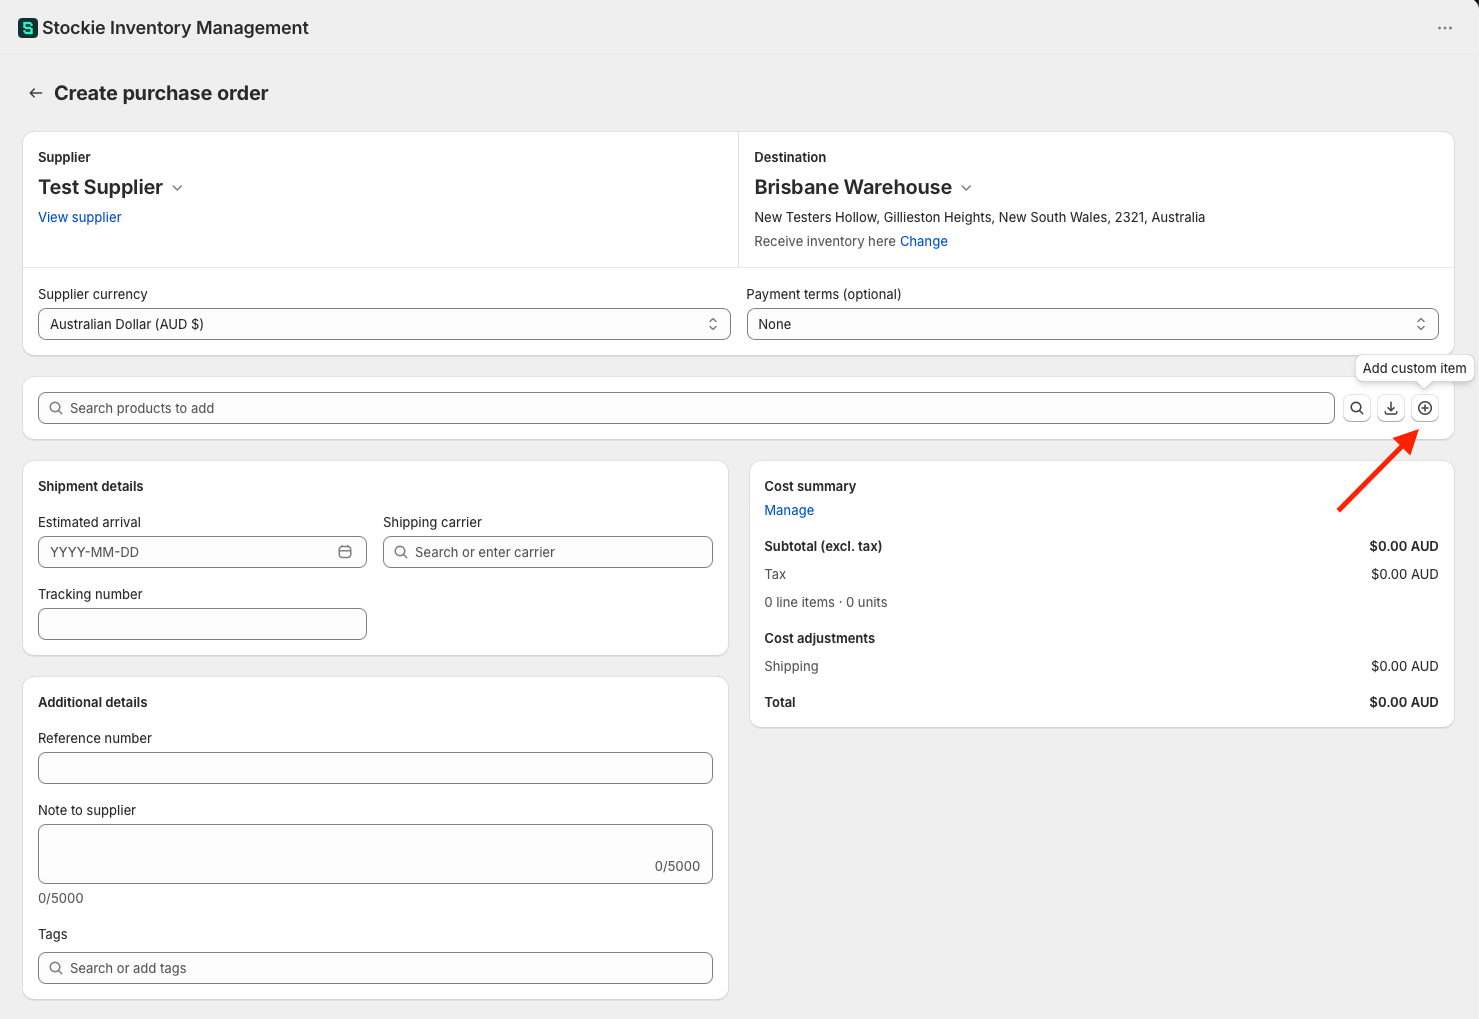
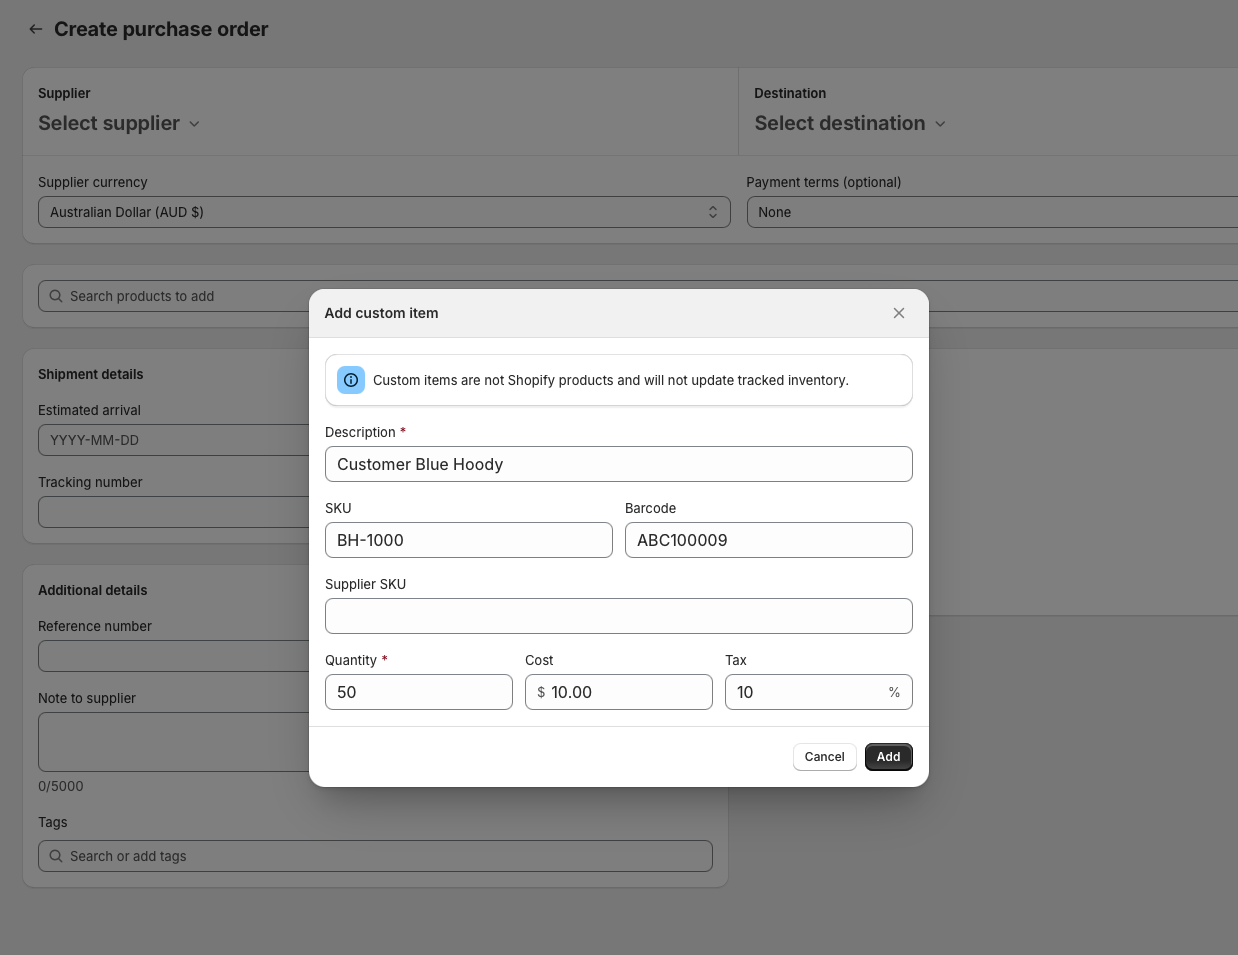
Use Add custom item for anything you are buying that is not a product in your store - shipping materials, display stands, a one-off charge from your supplier.
A custom line takes a Description, and optionally SKU, Barcode, Supplier SKU, Quantity, Cost and Tax. It shows on the purchase order with a Custom badge and appears on the copy your supplier receives, so the order total matches what you are actually paying.
Custom items never change your Shopify inventory. There is no product behind them to update, so receiving one records the receipt against the purchase order and nothing else. Order stock you hold as a normal product line.
Because there is no Shopify product behind it, a custom line also has no sales history, no stock figures and no product image.
Fill in the line items
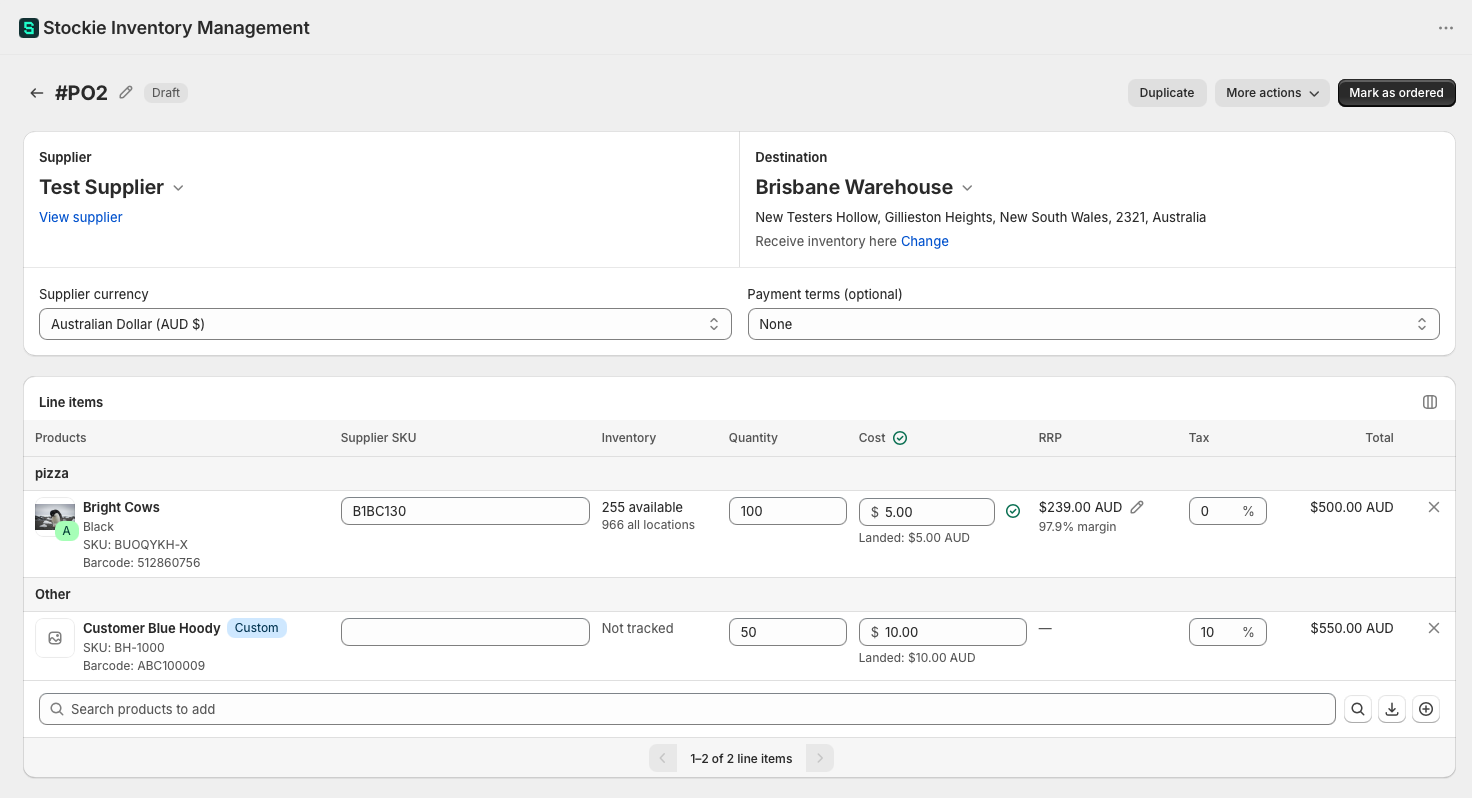
Each line carries:
- Quantity - how many units you are ordering
- Cost - what you are paying per unit. This fills in from the supplier's saved default cost where there is one
- SKU and Barcode - from Shopify
- Supplier SKU - the supplier's own code, if you have loaded them
- Inventory - available and on-order stock at the destination
By default each line also shows a Total - quantity × cost, including tax.
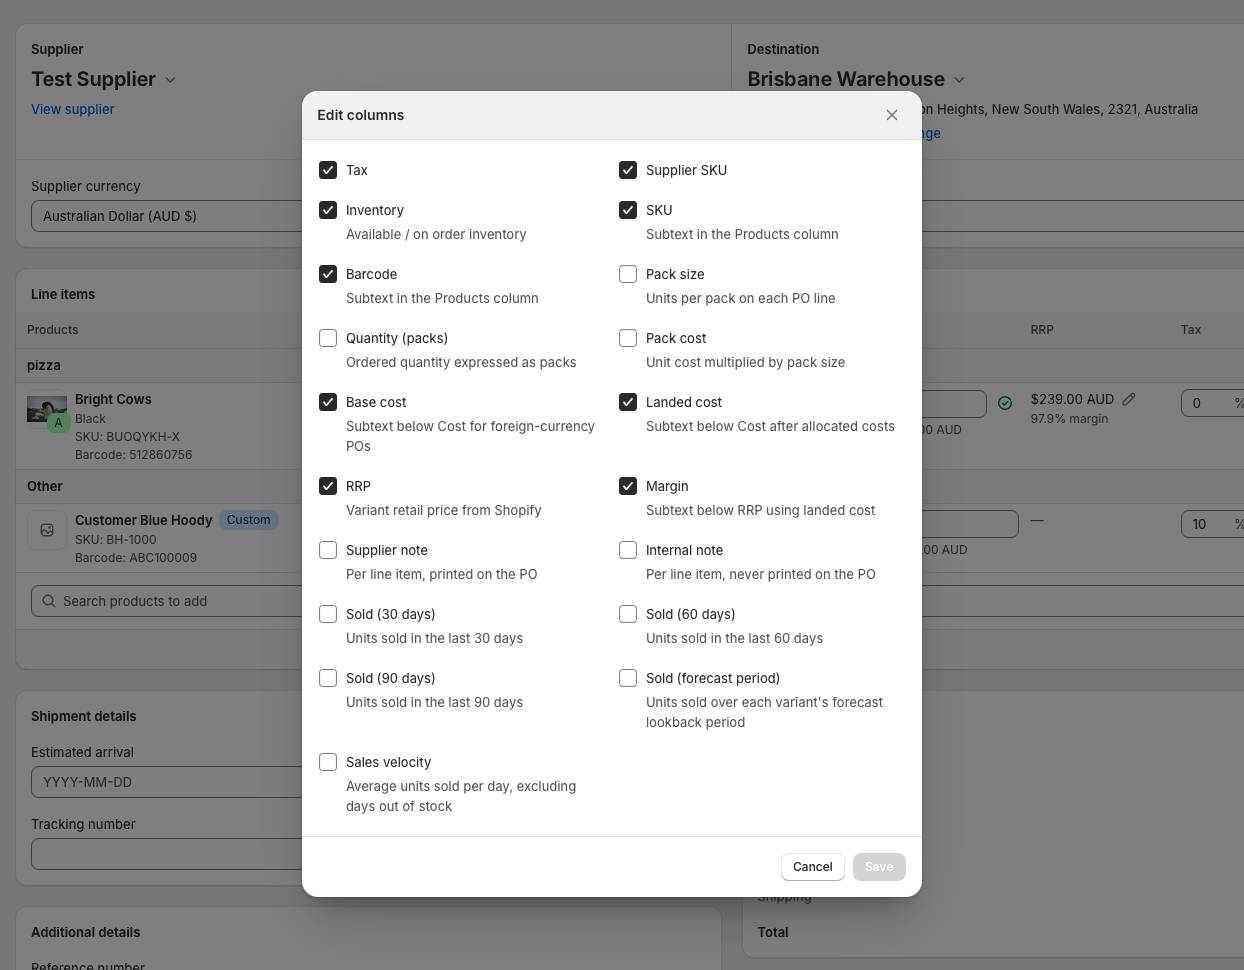
Some columns are hidden until you turn them on, including pack size, quantity in packs, internal notes, sales history and Subtotal (excl. tax), which shows each line before tax. Click the columns control at the top right of the line items table to choose what you see.
Add the details your supplier needs
- Reference number - your own reference for the order
- Estimated arrival - when you expect the stock
- Note to supplier - printed on the purchase order
- Internal note - for your team, never shown to the supplier
- Shipping carrier and Shipping amount, if you know them
- Payment terms, if you track them
Shipping, duties and other costs go in the Cost summary panel - click Manage to add them.
Save it
Save the purchase order and it is created as a Draft. Nothing is sent to your supplier and nothing changes in Shopify while it is a draft, so you can review and adjust it freely.
From here you can:
- Email it to your supplier, or export it as a PDF
- Mark it as Ordered, which writes the incoming quantities to Shopify
- Keep editing it - line items stay editable after ordering